 |
one of my kiddos left this on the board on the
last day of school! |
i hope everyone has had a fun and relaxing summer...i know i didn't keep up my promise from my last post in what, march??? ooops.... forgive me?? Well, to make it up to you, i have TONS to share....updates, ideas, DIY projects, and lots of photos!! so get excited, ok? GREAT.
 |
my absolute favorite place to be... seagrove, fl (outside destin)
my family goes every year.
i earned my full week of laying on the beach this year! ;) |
at the beginning of summer i was worried that i was going to run out of things to do...has that happened?? NO. I have kept myself busy and the time has flown by...why is it already the end of july??
- Question: who took a ton of stuff to work on from their classroom at the end of the year, and is just NOW starting to look through it???
that would be.....ME, ME, ME, Me!!!!
when i walked into target about two weeks ago and saw this particular sign....i decided it was time to get busy preparing.... :)
 |
| i mean it is just cruel to children to have this up so early in the summer!!!! |
ok ok...now to the good stuff!
I am so excited to start using the 'daily 5/cafe' program in my classroom this year!!!...one of my favorite things about the daily 5 is the 'i pick' system and 'shopping' for 3 good fit books once a week!! i know that last year some of my kiddos would spend half our reading time searching for a good book....instead of actually reading a good book!!! I wanted my kids to have a separate place to keep their good fit books because i don't know about your kiddos desks....but mine become a black hole after about 2 weeks! ;)
I looked into buying the chair pockets, but they were a little TOO pricey for me. Natrually i headed over to my second home, hobby lobby...and picked out some fun colorful fabric to make my OWN chair pockets, or 'reading bags' in my case.
- They are super easy to make, all you need is....fabric, thick elastic, fabric scissors, ruler/yard stick, pins, and a sewing machine (is faster)/ or needle & thread.
 |
| the fabric!!! (minus the top right...that is for my apt) |
 |
| the elastic i used |
 |
| you need lots and lots of pins!!! |
 |
my new favorite toy!!!!! i learned how to use it
this summer..... |
once you have all your materials...cut your fabric to the size you want them....make sure you have your 2 pieces of fabric 'bright side to bright side'...pin all four corner, and then put your piece of elastic inside of the 2 pieces, about an inch to the top and pin each side of the elastic to the fabric...so it stays in place!! Just like my picture below....
 |
| ready to sew!!! |
make sure you only sew 3 sides together....then turn your bags inside out...ok now...you need to fold the top edges down and iron them so you can stitch the top to look more finished, and so they don't fray!!
 |
| finished bags! |
I hope you could follow my (probably) confusing directions!!
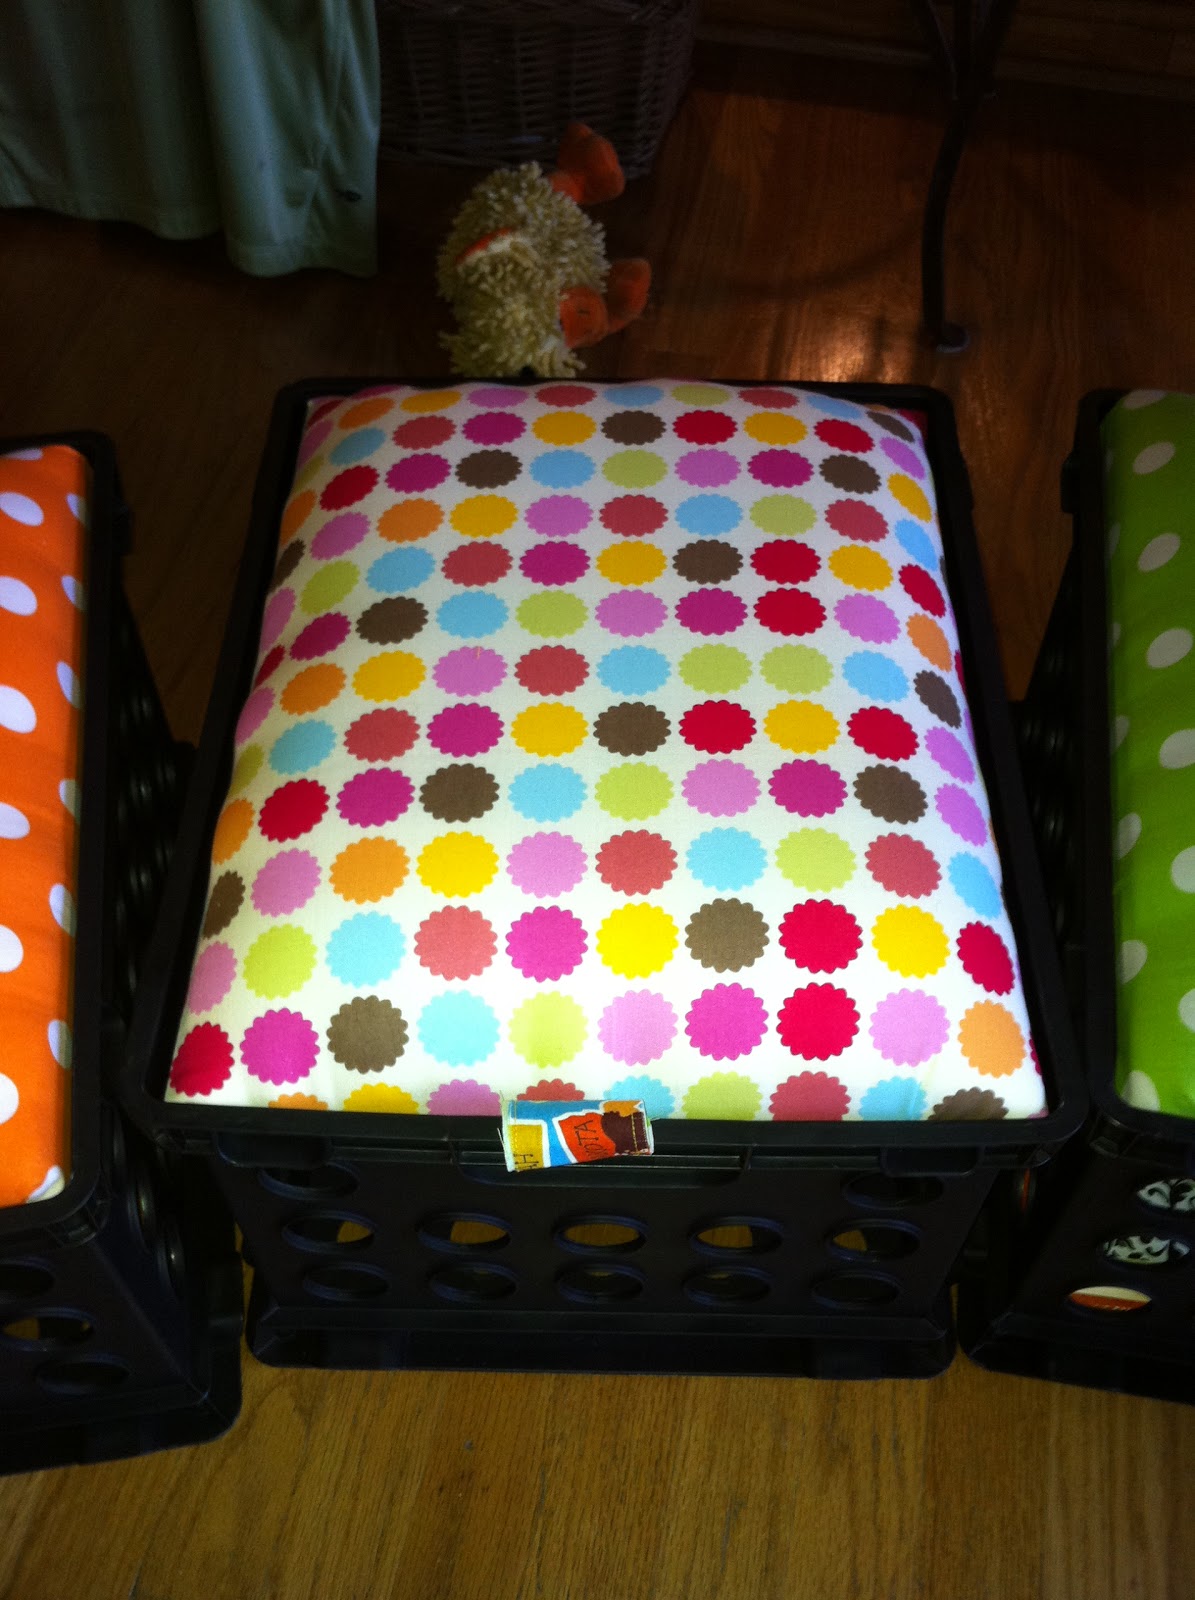
next on the list....i made these adorable 'crate' seats for my small group table (i made 5)....that you can also use as storage! they are SUPER easy to make...
All you need is... crates (i got mine at wal-mart), thick foam (it comes as a roll, i got mine at hobby lobby), plywood to fit in the top of the crate (i got mine at home depot, they cut it for you for FREE), scissors, and a staple gun.
 |
| staple gun & fabric scissors |
 |
| home depot to get the plywood cut ready to be covered! |
 |
cut your fabric about an inch larger than
the plywood! |
 |
cut one piece of the thick foam the same size as the plywood and
a second piece about an inch or so smaller. place the smaller one
on the plywood first, then place the larger piece on top. |
Then you just wrap the fabric around to the back of the plywood (pull very tight) and staple the fabric around the edge of the plywood! I also made small pieces of fabric to use as 'pulls' to staple on the bottom of the plywood. if you use the crate as storage, the pull makes it so much easier to pull the 'seat' up!!.... just like the picture below!
 |
| fabric to use as a 'pull' |
now you've got yourself, your very own, crate seat!!! :)

 |
| all 5! |
I had alot of extra fabric from the reading bags & crate seats so i made pillows for my reading area!! :)
 |
| pillows pillows everywhere |
 |
| front |
 |
| back |
 |
| front |
 |
| back |
I hope you have enjoyed some of my DIY craft projects that i have had fun with this summer...if my quick directions didn't help you, please don't hesitate to email me...sophie.kranz@gmail.com
Also...if you don't already have a pinterest account, you need to get one NOW...and if you do have one feel free to follow my boards (sophie kranz)...i will warn you though....it is soooo addicting!!!!
i'll leave you with this inspiration for the new school year...


